Middleware introduction
October 22, 2023 · 3 min read
Welcome to this Laravel middleware tutorial. In this concise guide, we'll dive straight into the heart of Laravel's middleware. Middlewares are a crucial part of Laravel's request handling process, enabling you to filter, modify, or manipulate incoming HTTP requests. Whether you want to add authentication, logging, or any other custom logic to your application's request flow, understanding and using middlewares effectively is essential. Let's get started.
Creating a Middleware
Laravel middlewares are located in the app/Http/Middleware directory. To create a new middleware, you can use the artisan command-line tool:
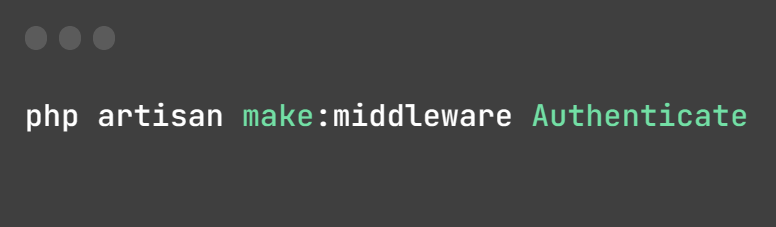
This command will create a new middleware file named Authenticate.php in the app/Http/Middleware directory.
Creating Aliases
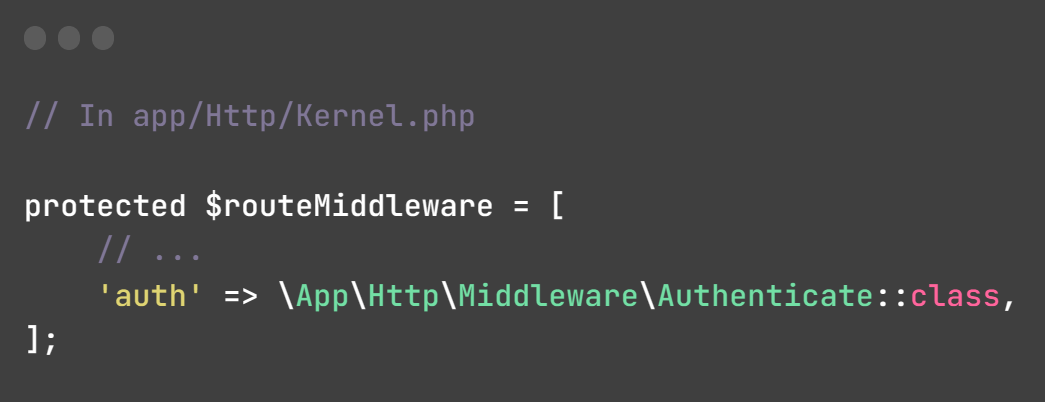
After creating a middleware, you can register it in the $routeMiddleware/$middlewareAliases array located in the app/Http/Kernel.php file to call it more easily. Here's how to create an alias for your middleware:
Middleware & Responses
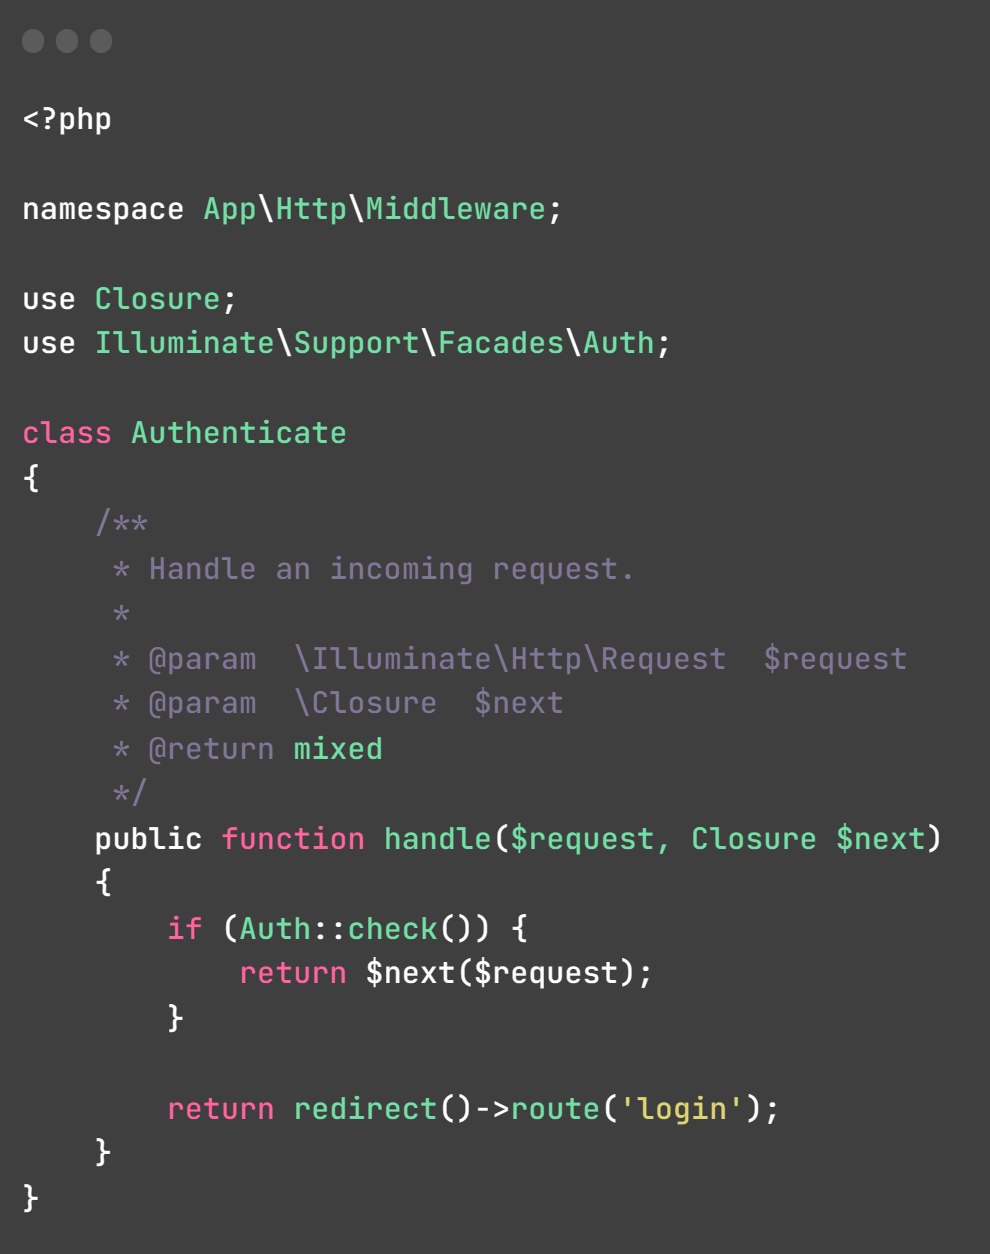
This middleware, named Authenticate, checks if a user is authenticated. If authenticated, it allows the request to proceed; otherwise, it redirects unauthenticated users to the login page.
Using Middleware in web.php
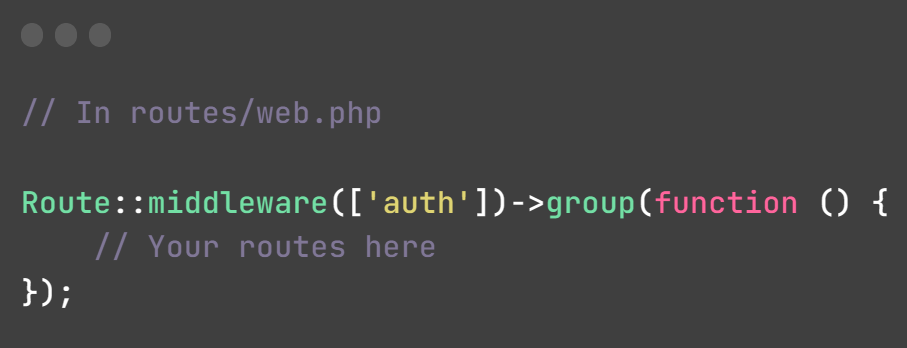
This code block applies the auth middleware to a group of routes. The purpose of this is to enforce authentication requirements for all the routes defined within this group. In other words, only authenticated users will be able to access the routes enclosed within this group:
Conclusion
This tutorial covers only a small portion of the vast capabilities that Laravel offers. For more in-depth information and exploration, I highly recommend referring to the official Laravel documentation.